DATE AND TIME: 03/02/2015
LOCATION: Chandler 260 lab, Columbia University
SUBJECT: Cuttlefish bone casting
Cuttlefish protocol developed prior to class
Before class on Monday, I took a look at the various references to casting using cuttlefish 'bone' that Jef sent over by email. I made some protocol notes to the following effect:
- The first thing that appears necessary to do, according to the ms, is to dry the bones out, although the manuscript is careful to stipulate that they shouldn't be dried too much because it will make them too brittle. The description of cuttlefish bone casting on f.145r says that the bones should be dried by placing them near a fire, until they "cry & crackle" when you press them.
- After that, the next step seems to be cutting the bone in half. The description of the process on f.91r states that one should "...divide the bone into two pieces".
- This should be followed by filing down and polishing the bone. F.91r states that after cutting the bone into two pieces, the next step is to "smooth the two parts with a knife. And on a dry, smooth rooftile [that has been] pulverised with willow charcoal, rub and polish the two half bones". The willow charcoal here is apparently acting as a separator: the writer claims that "[i]n this way, the bones soak up the willow charcoal so that the bones will come off cleanly from the cast, and will not stick to it". The side that is to be filed down is the "back of the bones...because the marrow there is more delicate" (f.72r). The tops and bottoms of the bones should also be filed off, so that the top and bottom of the mould are flat.
- Make notches in the two half bones when they are lined up, so that you can tell how to put the mould together
- Various descriptions as to how you should actually press the objects into the cuttlefish -- f. 91r says that you can place the object you want to cast on a piece of "smooth brick of the same width as your bone", then put the bone on top of the object, and then press down firmly with another piece of brick. Another says that you can do it by pressing your unshod foot onto it, while another says that you can press it in between your knees. The ms explicitly says not to use a press because it will break the delicate bones. f.91r says to mould two or three times "at your leisure", so it must be relatively difficult to make an impression?
- Dust the object in willow charcoal each time.
- Cast lead/tin "at medium heat". f.145r says not to cast too hot or it will burn the bone. Test: dip a piece of paper in it; if it turns black without catching fire it is the right temperature. If it burns and catches fire, it is too hot.
Preparation
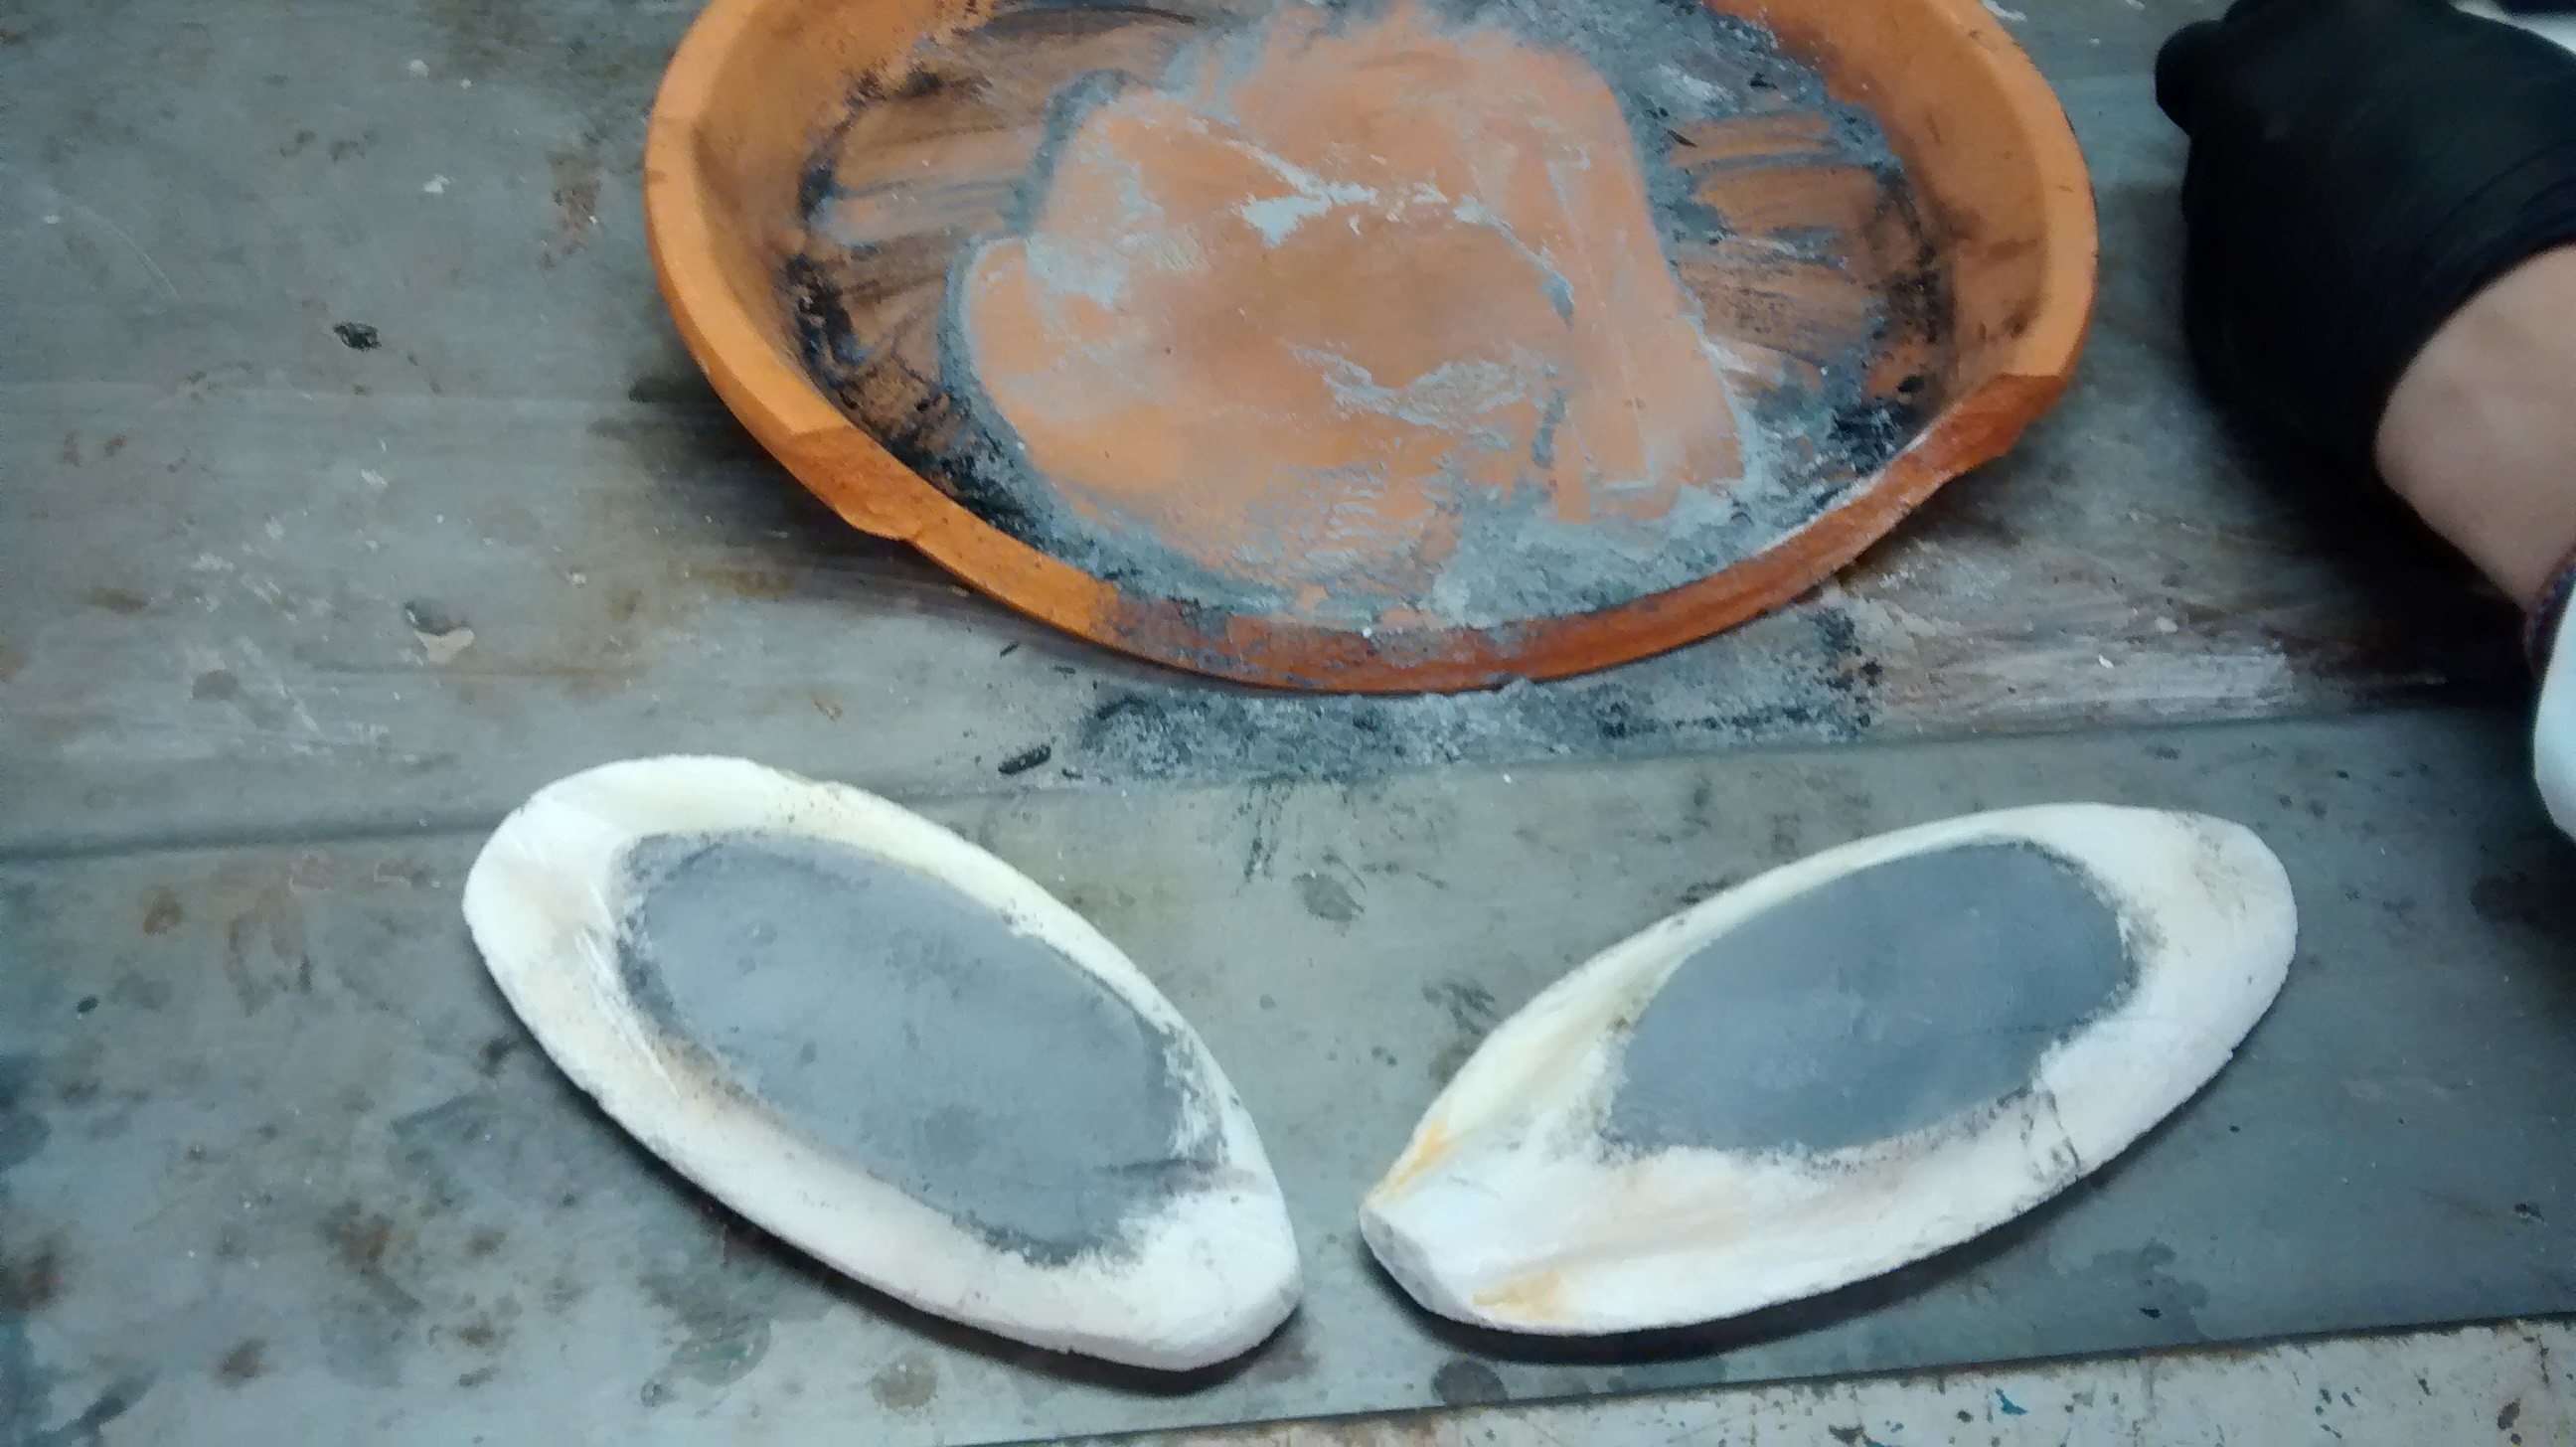
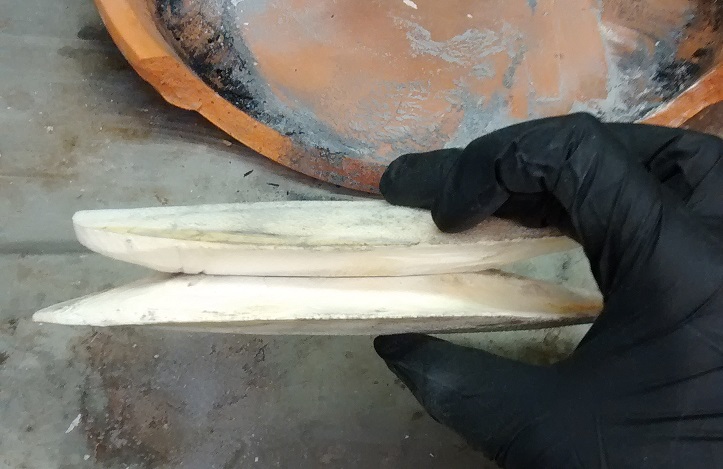
After discussing the various references to cuttlefish prepping in the manuscript, I partnered with Caroline and Celia to prepare our cuttlefish bones according to the description on f. 91r – by rubbing the bone in brick pulverised with willow charcoal. Celia decided to make her mould by pressing her foot onto the cuttlefish bone, positioned above her object (described on f.?), while Caroline and I decided to press the bone between our knees, described as a suitable method on the same folio.
In lieu of the rooftile mentioned on f.91r, we used terracotta plates, onto which we crushed willow charcoal by hand. This method was relatively slow-going at first, but soon sped up as I went along: in fact, I was a little concerned that I would pare down the cuttlefish bone a little too much, making it too thin for casting. Andrew Lacey suggested that the process could be made even quicker if I used a brick instead of the terracotta, because of its rougher surface: I used this on the second set of cuttlefish bones I used, and it was definitely a much quicker method.
Pressing the mould and casting
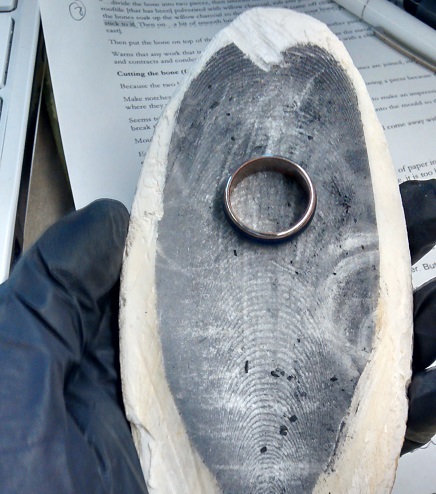
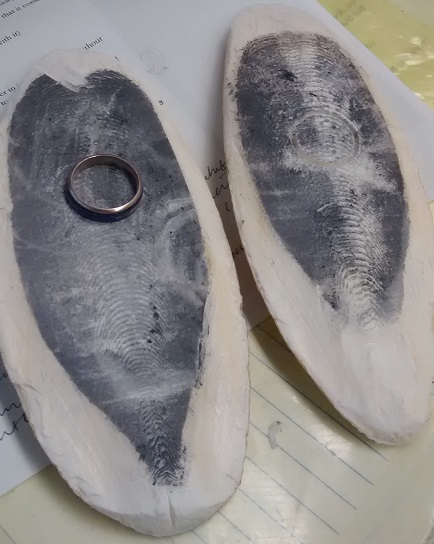
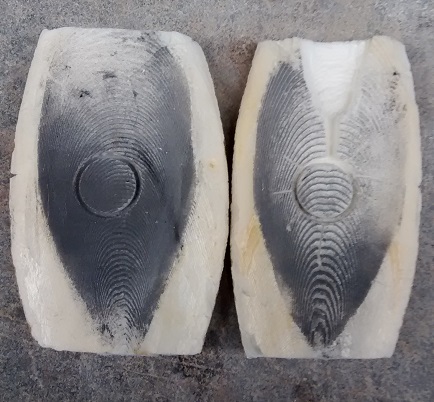
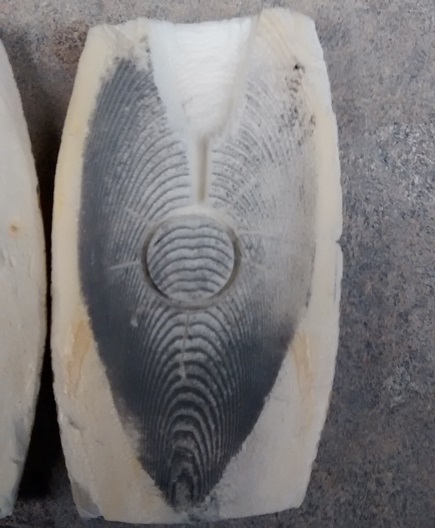
The object I had chosen to mould was a plain ring with no adornments – a very simple design. I began to press the mould by placing my hands on the ‘shells’ of the cuttlefish bones and then placing my hands between my knees and squeezing. The entire process felt very perilous: I felt that the bones might crack at any minute. It was a little like trying to mould something in meringue! Luckily, because my object was pretty simple, I managed to impress it in the cuttlefish bone without creating any major fissures. Or so I thought – after leaving the mould for five minutes, I came back and realised there was a hairline split in the mould that might prove problematic when casting. I therefore repeated the filing and moulding process with another set of bones, this time filing on brick as per Andrew’s suggestion. This also went pretty smoothly. When moulding, I made sure to leave a one-inch perimeter between the edge of the mould and the impressed object, which Andrew had also suggested might be helpful when it came to the casting stage.
After impressing my second set of moulds, I sawed off the top and bottom of the bones to create flat edges as per the manuscript, and then carved an ingate at the top for casting. At this stage I also carved notches in the two bones, so that I could easily align them for the casting process. I also made very shallow vents around the ring impression, radiating outwards. Finally, I bound the bones together with thin metal wire and tape to ensure that they didn’t move when the lead/tin mixture was poured into them.
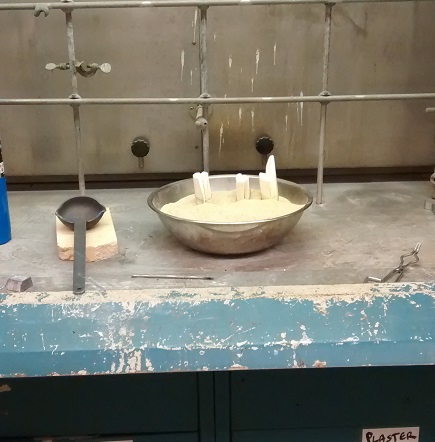
The metal mixture used for casting was molten tin and lead in a 2:1 ratio. Andrew propped the bones upright in a bowl of sand, and then poured the molten metal into them (we also used the test from the manuscript for determining if the metal mixture was at its correct temperature, dipping a piece of paper into it and seeing if it blackened). The week after, I took apart my cuttlefish bones and removed my cast ring, which looked pretty good! Interestingly, the metal had moved into the very fine sprue vents I had carved outwards from the ring, producing a sun-like effect. Also, the two halves of the ring were slightly misaligned, suggesting that the bones had moved a little during the casting process.
ASPECTS TO KEEP IN MIND WHEN MAKING FIELD NOTES
- note time
- note (changing) conditions in the room
- note temperature of ingredients to be processed (e.g. cold from fridge, room temperature etc.)
- document materials, equipment, and processes in writing and with photographs
- notes on ingredients and equipment (where did you get them? issues of authenticity)
- note precisely the scales and temperatures you used (please indicate how you interpreted imprecise recipe instruction)
- see also our informal template for recipe reconstructions